It is possible to determine whether a man is the father of a child using various methods. But the most reliable result is provided by genetic testing of DNA. And although this is not the cheapest procedure, the price of a DNA paternity test in St. Petersburg in the Lab-DNK laboratory is quite affordable for most clients.
The collection of material for examination is usually carried out in a medical institution. But, if it is not possible to come to the laboratory, then it is quite possible to conduct a home DNA paternity test. Of course, this does not mean that the analysis will be obtained at the customer’s home. Simply, biomaterial will be collected at home, and the examination itself will be carried out in a licensed laboratory.
Is it possible to test DNA for paternity at home?
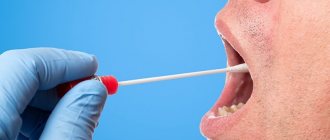
It will not be possible to check the fact of biological relationship at home. Home DNA testing involves collecting buccal epithelium. You can do this yourself using a special set of tools and following the instructions.
The resulting material is sent to a medical laboratory. Specialists use biological data from the father and child.
To obtain a more reliable result and simplify the procedure, additional cells from the mother will be required. In order for the results of a DNA test to be full-fledged evidence and used in the future, it is necessary to follow a certain procedure for collecting the material.
It is recommended to take into account such nuances as:
- use of a special sterile kit obtained from a medical center;
- strict adherence to the attached instructions when collecting material;
- packaging the result in an envelope and sending it to the laboratory for research.
Home DNA test kit
If the procedure for obtaining DNA at home is not followed (for example, a kit not from a laboratory is used or the material is packaged incorrectly), its results will not constitute reliable evidence for presentation in court. To avoid such mistakes, you need to study in more detail the instructions for obtaining DNA at home.
It is strictly forbidden to touch the head of the cotton swab with your hands. It must be taken by the cut end. During the procedure, at least 10-12 movements are made up and down along the inner surface of the cheek, tightly pressing the head of the stick to the mucous membrane.
Reliability of DNA paternity test
The DNA strand is made up of 46 chromosomes, namely the main carrier of the unique information of each individual person. That is, each person has his own genes, they allow data to be passed on as sperm to the next generation. Cells that contain DNA store stored information about a person at conception and can restore the necessary set of genetic characteristics. That is why a DNA strand is used to confirm or deny the relationship of two people. If a child was conceived from a prospective man, then a set of his genetic characteristics is passed on to him, as a result of which the chromosomes from two biological materials (father and child) match and the test gives a positive result. Therefore, the reliability of this test is high.
A DNA test can be performed to establish paternity both after the birth of a child and during pregnancy, if the mother is not diagnosed with “Threatened miscarriage.”
How to do a test at home?
The DNA test procedure does not take much time (on average, 4-5 minutes), is safe and painless for adults and children.
First, a medical center employee sends materials for collecting buccal epithelium; this kit includes:
- detailed instructions;
- sterile sticks;
- multi-colored envelopes.
Samples are taken subject to the following rules:
- prepare materials - cotton swabs and paper envelopes in a certain quantity for each person participating in the study. It is better to order such a kit from the laboratory;
- Fill out the envelopes correctly. On each of them you should indicate the last name, first name, patronymic, date, month and year of birth, degree of relationship, as well as the date of collection of the biomaterial. If the procedure is anonymous, then instead of full name. the number is indicated;
- Take a swab from the inside of the cheek of all people being tested. Each person will need two sticks, from which one cotton head should be cut off. If one of the people being checked is an already born child, he and the alleged father will be checked. When a paternity test is performed during a woman's pregnancy, a sample of the man's buccal epithelium (or some other type of sample) and the mother's blood are required. In the latter case, this procedure must be carried out in a specialized institution;
- hold the stick in the open air after the smear for about 1 minute to evaporate excess moisture;
- Place the sample in a clean envelope, the inner surface of which should not be touched with your hands. Envelopes are sealed strictly using an adhesive strip;
- repeat the procedure completely, taking a smear from the other side of the cheek;
- send envelopes with samples to the laboratory.
So, at home you can only obtain biomaterial; further research is carried out exclusively by experienced experts, within the walls of the laboratory.
Cost of analysis
DNA testing is a rather complicated procedure, and not all medical institutions provide it. Since it requires expensive equipment and qualified specialists, its price will not be cheap. Today, a DNA test to establish kinship can cost you approximately 5,000-7,000 rubles for each participant. The price can sometimes reach up to 10,000 rubles. It all depends on the region of residence, the medical center where you went, and the urgency of the procedure. The standard price is for results within 14 days. If you need to know the answer urgently, within 2-3 days, then you will have to pay two prices.
When the issue of establishing paternity is raised forcibly through the judicial authorities, many clients, coming to the laboratory, ask: “Is it possible to conduct an examination for free?” The law in this case imposed all costs of the lawsuit on the plaintiff. If, in the process of establishing paternity through the court, the fact of kinship is proven, which the defendant evaded, then the court may oblige him to compensate for the plaintiff’s waste. [adsp-pro-1]
Accuracy of genetic analysis
Reliability and maximum accuracy have made DNA tests so popular and an indispensable procedure in the field of medical research and legal evidence. Genetic testing helps to accurately identify a person’s identity, establish the degree of relationship, or diagnose complex hereditary diseases.
The accuracy of a DNA test depends, first of all, on the depth of the study performed and the volume of material taken. To obtain the most accurate result, more DNA fragments need to be analyzed. As mentioned above, a standard sample of buccal epithelium is taken from the buccal mucosa.
If it is not possible to obtain buccal epithelium, it is recommended to use samples of another origin:
- part of a cut nail;
- blood stain or semen;
- personal hygiene items or clothing.
Despite the non-standard nature of these biomaterials, there is a chance to achieve no less accurate DNA research results. The accuracy of the test is also influenced by the level of professionalism of the specialist and the correctness of the samples.
According to the 1991 International Standards, the probability of exceptions should not be less than 99.99% for the set of markers required for a DNA paternity test.
In biology, there is also a specific formulation: the accuracy of the test depends on the frequency of the presence of alleles (different forms of the same gene) transmitted from father to child.
If biological relationship is confirmed, its indicator is calculated as follows:
- First, an index is determined for each locus. The overall index (CPI) is the product of the coefficients for all loci;
- Next, a probability indicator is introduced in relative terms, which has a value of 1.0: (1.0 + CPI).
The maximum probability of biological relationship with a positive result is 99.999999%. But, if the analysis does not reveal a match between the DNA fragments of the alleged father and the child, a 100% negative result is given.
Dear readers! To solve your problem right now, get a free consultation
— contact the on-duty lawyer in the online chat on the right or call:
+7
— Moscow and region.
+7
— St. Petersburg and region.
8
- Other regions of the Russian Federation
You will not need to waste your time and nerves
- an experienced lawyer will take care of solving all your problems!
Decoding the results
Testing is carried out in our new laboratory using modern equipment.
Carrying out the test and deciphering the result usually takes three business days. If we are talking about a paternity test, then there are two possible results: a positive result, in which the probability of paternity is 99.99%, and a negative result, which excludes the probability of paternity by 100%.
How long does it take to do a DNA test?
As noted above, the final price of the services will depend on the speed of the procedure. So, according to the general rule, the average duration is three weeks. This time is counted from the moment the biological materials are received. The expedited process can be completed in 3-5 days, but at a higher cost accordingly.
Important! No more than five days should pass from the moment of collecting the material to its transfer to the medical center, otherwise the samples will be unusable or the accuracy of the result will be significantly reduced.
DNA paternity test results
The results of the study are deciphered in percentage terms. So, if certain numbers indicate that the participants are relatives, then the probability of paternity will be 99.9%. This figure is due to the fact that if the father has twin brothers, their genetic sets will be almost identical. In the case of negative results, it is indicated that there is 100% no biological relationship.
In fact, it is possible to conduct the test anonymously, that is, an interested parent, living with his wife and child, can prepare biological materials and submit them to the clinic for testing. False information is provided on the names, and the response is provided through remote communication channels.
What is needed for analysis
The most common question before conducting a DNA kinship analysis is the subject being studied, that is, human biological material, which contains the necessary genetic information. So, the following can serve as material for conducting a genetic examination from the father and child:
- blood;
- saliva;
- sperm;
- hair;
- nails;
- earwax;
- stains on the fabric of natural human secretions;
- Toothbrush;
- razor;
- cigarette butts;
- chewing gum.
If there are no problems with collecting material, then laboratory staff advise providing saliva from the inside of the cheeks, since these cells are buccal epithelium.
The specialist’s task is to examine several fragments of a molecule that contains genetic data at once in order to verify the authenticity of the results several times. That is why it is best to carry out this procedure within the walls of the laboratory so that various external factors do not affect even the slightest fraction of the deviation.
KNOWLEDGE SCHOOL "VENDA"
DNA at homeHeredity, genes, DNA... It seems that these words have long ceased to be scientific terms, have entered everyday life and are now familiar to every high school student, not to mention students. But most of us have never seen any DNA, although seeing it is quite possible even at home. In one of the genetic laboratories, on the wall hangs, for example, the following instructions:
How to isolate your own DNA.
1. Take something that contains a lot of DNA. For example, beans (but you can also have pork liver, fish milk or radishes).
2. Place about 100 ml (half a glass) of this product in a mixer, add 1/8 teaspoon of salt and 220 ml (a glass) of cold water. Beat for 20 seconds. The mixer will “cook” you bean-cell soup.
3. Strain the mixture through a strainer or a piece of gauze or nylon (stocking is fine).
Add 1/6 of its amount (this will be about 2 tablespoons) of liquid detergent (for dishes, for example) to the resulting pulp and stir well. Leave for 8-10 minutes.
4. Pour the liquid into glasses or other glass containers so that no more than 1/3 of the volume is filled in each.
5. Add a little bit of either pineapple juice or contact lens solution to each tube and shake gently, inverting and tilting the tube (if you shake too vigorously, you'll break the DNA and won't see anything).
6. Tilt the test tube and slowly pour some ethyl alcohol into it until it forms a layer on top of the bean mixture. Pour until there is equal amounts of alcohol and mixture. The DNA will float to the top as flakes.
7. Use a wooden stick (pencil) to catch them and examine them under a microscope.
For scientists, this instruction is to some extent a joke and none of them extract DNA in this way, but meanwhile, if you really use it, then everything will work out! The yield of DNA will, however, be small, and the substance will not be particularly pure, but it is quite possible to see long thin threads - DNA crystals - under a microscope.
What happens to beans or pork liver during the described manipulations and why does the DNA ultimately end up being separated from all the other substances, of which there are a great many in the cell?
1.Selecting an object.
DNA, as is known, is present in every cell, which means it can be isolated from any tissue - even from animal bones, fish scales or wood, where there are not so many cells compared to the volume of extracellular substance.
In all tissues of the body, both animal and plant, the DNA is usually the same. These tissues differ in that in some of them, apart from the substance of heredity, there is almost nothing else (herring milk), while in others, such as bone tissue, the DNA content is relatively small.
In general, if the researcher does not have any special task, he tries to choose tissue for work that has little intercellular substance and a lot of cells themselves.
Moreover, it is desirable that the tissue easily breaks down into these components, and that the cells are not overloaded with proteins (like muscle cells), lipids (like fat cells) or polysaccharides (like brain cells). 2. We crush the tissue into cells.
In the mixer, the tissue from which we are going to extract the substance of heredity breaks down into individual cells: to mechanically break the bonds between them, as a rule, much less effort is required than to damage the cell itself. And since our method of DNA isolation requires more or less whole, undamaged cells, it is clear that canned peas, corn or salted herring are not suitable for such an experiment - it is better to take something fresh frozen if you are sure that the product has not been thawed in storage process several times.
And a little salt needs to be added to the solution so that the cells do not burst prematurely: the pressure of the internal contents on the cell membrane from the inside is balanced by the pressure of the saline solution from the outside.
3. Release the macromolecule
As for filtration, it is needed in order to mechanically remove all kinds of impurities from the cell suspension, including large pieces of tissue - anyway, the substances with which we are going to process the mixture will not be able to penetrate deep inside such conglomerates, and to isolate DNA they will be useless.
And the resulting cells should be treated, first of all, with some kind of detergent. The Ferry product, which, according to advertising, can easily wash the greasy dishes, is also suitable for making large holes in the lipid membrane of both the cell itself and its nucleus. If you don’t have liquid detergent, you can make a concentrated solution of laundry detergent - this will also work. As a result of this treatment, all the cellular contents will fall out and end up in a solution, which will become very viscous, viscous and significantly more transparent than the cell suspension was. A change in the consistency of the solution is a sure sign that the lysis was successful.
4. Everything is clear here and without comment -
Do not pour too much solution into the container, there is still a lot to be poured into it, and if there is too much of the mixture, it will be difficult to mix.
5. Getting rid of proteins
There’s everything we don’t have in our mixture! However, there are the most proteins here, and they form the strongest complexes with DNA. There are methods when proteins are removed from solution in several stages. For example, some of them easily denature and precipitate when concentrated solutions of salts are added. In laboratory conditions, such techniques work great, and researchers get rid of sediment by placing the test tubes in a centrifuge for a few minutes.
We will immediately move on to purifying DNA from residual proteins using special enzymes that can destroy these molecules. These are the substances that pineapple juice contains. They themselves are also proteins, so the pineapple from which the juice is squeezed must be fresh: the enzymes do not have the slightest chance of remaining unchanged in a compote or in a canned product. As for the lens cleaning solution, if you are going to use it, do not forget to include a tablet to remove protein deposits! The solutions for storing contact lenses themselves do not contain any active substances - otherwise our eyes would be in trouble.
The fact that the enzymes have worked can be judged by a decrease in the viscosity of the solution. If this does not happen, place the mixture in a warm place (about 37C) for half an hour, sometimes you may need to add more pineapple juice or lens cleaning solution.
6. Precipitate DNA from solution
Now the DNA floats in the solution on its own. The proteins no longer cling to it, although there are still a lot of fragments of all kinds of molecules in the mixture. In laboratory conditions, these unnecessary fragments are removed by thoroughly mixing the solution with phenol and/or chloroform. After centrifugation, phenol and/or chloroform with proteins dissolved in them are found at the bottom of the tube, and at the top is an aqueous phase containing DNA. The aqueous phase is collected in a separate test tube and then work with a relatively pure solution.
In the absence of a centrifuge and organic solvents, the work with which also requires special safety measures, this stage of cleaning at home has to be skipped and the DNA can be precipitated directly from the “dirty” solution.
Let us note right away that you cannot replace ethyl alcohol with vodka or perfume: if the alcohol concentration is low and drops to 60-65% when mixed with the aqueous phase, the DNA will not go into a crystalline state. Partly for this reason, alcohol should be poured into a test tube containing a DNA mixture carefully, layering it on top. Then the lower layers of alcohol will partially mix with the DNA solution, the process of crystallization of nucleic acids will begin, and they will float to the surface (where the alcohol is more concentrated) in the form of flakes.
If pouring alcohol on top does not work and everything is hopelessly mixed, then with a small amount of ethanol you will not succeed at all, and with a large amount, not only DNA will begin to crystallize: the remains of proteins and something else from the original contents of the cells will precipitate.
7. What did we get? (see picture below)
Pure DNA crystals look like balls of tangled threads, but we must not forget that you are seeing crystals of a substance, not its macromolecules, and it is, of course, impossible to tell by their appearance which genes the nucleic acid you have isolated contains. To find out, you'll have to dissolve the DNA again. However, it is, alas, impossible to “read” the sequence of nucleotides at home: this requires not only special devices, but also expensive reagents.
However, if you have already taken a good look at the crystals and they have had time to dry, you can watch how the DNA dissolves. At first it swells, becoming like a gelatinous jellyfish, and only after a few days the solution becomes homogeneous.
The process can be speeded up by shaking the test tube frequently.
I wish success to aspiring geneticists and molecular biologists!
Material prepared by: biology teacher of the National Educational Institution Secondary School "VENDA" Ledukhovsky N.V.