If documents are stitched incorrectly
- Incorrect firmware of documents may be a reason for refusal to accept them. And this is wasted time, effort and money down the drain.
- Incorrect or poor-quality firmware of your organization’s documents may serve as a reason for interested parties to refuse to cooperate.
- If the documents are not carefully stitched, then there is a high probability that they will be disorganized or even replaced, which will be very difficult to prove during future verification.
And these are just some of the problems that can be encountered when documents are inserted incorrectly.
What documents need to be stapled and why?
Documents are stapled to ensure they are not lost or replaced.
Also, documents undergo firmware due to the large flow of documentation, so as not to get confused in business papers. Typically, those documents that are submitted to archives, sent for inspection, or have some value for their owner are subject to stitching.
Documents that must be stapled:
- archival;
- accounting;
- personnel;
- For checking.
The exception is documents for the tax service.
There is no need to sew them together, since tax officials repeatedly have to dismantle them for scanning and other manipulations. Important!
The clerk must remember the accuracy and quality of stitching. Otherwise, if the documents are disbanded or if they are lost, all responsibility will fall on his shoulders.
How to correctly stitch and number documents according to GOST - step by step photos and sample
Before flashing, be sure to remove all foreign objects from the papers: paper clips, staples (it is more convenient to remove them with a stapler). Fold documents according to the date they were compiled and in such a way that they are easy to view later.
We recommend reading: Izhevsk regional maternity capital for a third child
According to GOST, the documentation must not only be bound and numbered, but also certified. This is done on a rectangular paper sticky note.
Preparing documents for stapling
Before starting the main work, documents must be prepared. The preparation process takes place in several stages:
1. Cover design.
Covers for documentation come in three types:
- Standard – the usual cover that is most often found. Cover size 229x324 mm, accommodates standard sheets (mostly A4).
- Non-standard – used if the document format is of an unusual size.
- For long-term storage - these covers are made of durable cardboard for longer storage. They must be dense and wear-resistant.
2. Equipment.
We are preparing a set of documents. The pack should contain no more than 250 sheets. Its thickness should be no more than 4 cm. A blank sheet must be added to the block. All paper clips and pins must be removed.
3. Numbering.
Page numbering is done only with a simple pencil. The number is placed in the upper right corner. No Roman notation. The inventory is not included in the numbering. Page numbers should not affect the text of the document.
Important!
In the process of numbering with the title page, the number “1” is not placed; we number only from the second sheet with the number “2”. Basic instructions:
- If the documentation contains a large format sheet, it must be unfolded and numbered in the upper right corner, then folded in the same way. It is hemmed neatly, at one edge, so that it can be unfolded several times.
- In documents, letters are stored in envelopes. First, number the envelope, then all the letters enclosed in it.
- If the volume of documentation is too large (more than 250 sheets), then it is divided into volumes that have their own separate numbering.
- Sometimes documents contain separately numbered editions. They are also numbered, despite the existing numbering.
- If the documentation contains glued sheets, then this document must be numbered as one. Next, an inventory of the attached additions is compiled on the reverse side of this sheet.
- When the sheet is completely occupied and there is no room for numbering, they are numbered on the back of the document.
- If the numbering is incorrect, the number is crossed out and the correct one is added, and a certification inscription must be made on the corrected section.
4. Inventory.
Each bound document must have its own inventory, in which you must indicate:
- organization and title of the document;
- date of filing and shelf life;
- detailed annotation (purpose of storage, content, number of pages and other important notes);
- number of documents and signature indicating full name.
Note!
Documents intended for internal use are stapled according to the rules established by your organization.
How to certify a bound document
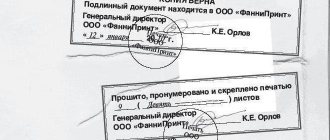
After completing the procedure, a certification note must be made. It must be drawn up on a separate sheet and placed on the last sheet of ready-made papers. The note should contain the number of all numbered pages that were bound, and also describe notes about the condition of the documents, possible marks or torn sheets. The inscription is signed and certified by the head of the organization, indicating on it his position and a transcript of the signature.
You might be interested in this: How to quickly sew a dress on your own with and without a pattern
Powerful hole punch
The certification inscription should be glued with high-quality glue so that it remains reliable even after a long time. A seal is also required, which should capture not only the inscription, but also part of the document sheet.
Stapling documents is one of the stages of organizing order
Possible stitching options
There are many ways to bind documentation. It all depends on the available equipment and management requirements. Here are some options:
- The classic method is using a needle and thread. Usually a small volume of documents is stitched using two, three or five punctures. The threads are fastened together and a certification inscription is glued to them.
- Using a screwdriver and tight rope. Suitable for bulky materials.
- Using a hole punch. Similar to the classic method, only instead of a needle there is a hole punch.
- Using a binding machine. This type of stitching is used only in printing houses.
Document binding process
We remove all brackets, paper clips, number them, put them in an even pile and begin stitching:
1. Make 3 holes (punctures) in the documents with a needle (if necessary, with an awl). The distance between the holes is about 3 cm. The thread is 80 cm long.
Note!
Regular threads can be fragile, it is better to use thicker and stronger ones. As a last resort, you should fold the thread two or three times. 2. We thread the needle from the wrong side into the middle hole.
3. Then immediately stick the needle into the top hole.
4. After the top puncture, we stick it through the wrong side into the bottom hole.
5. Next, coming out of the lower hole, we pass into the middle one. If you need to stitch a large number of cases, then repeat the stitching process several times to strengthen the folder.
6. Tie a simple knot on the wrong side.
There should be a thread tail of about eight centimeters left. 7. We glue a certification sheet onto the bundle, on which we make the necessary entry. The sticker with the certification inscription usually measures 4x6 cm. The sheet is glued to the knot and part of the threads.
Note!
The documents must be certified by the head of the organization or his authorized representative.
8. We put a stamp and signature.
Important!
When certifying bound documents with a signature and seal, place them so that part is on both the sticker and the document being certified. This will guarantee the safety and integrity of documents.
How to staple documents correctly: step-by-step instructions
There are several options for how to stitch files and documentation. The differences between them are that all methods have a different number of holes and the distance between them.
In two holes
The most simplified way. It is suitable for papers that will not subsequently be submitted for review. To do this you need to do the following:
- Print and fold the sheets in order;
- Use a hole punch to create small holes;
- Thread the thread through the holes so that there is room for a knot on the front side;
- Cut a small sheet from the sheet of stitching and glue it on top of the knot so that the ends of the thread peek out from under it.
Important! If there is no sheet of firmware, you should cut out a small piece of white paper measuring 3 by 5 cm, glue it and label it “stitched and numbered.”
Paper filing tool
Three holes
First, the locations of the required holes are marked, preferably in the middle, unless otherwise required. The holes should be located at the same distance from each other and along the left edge of the documentation. After this you need to do the following:
- Use a needle to make a hole in the middle of the left side of the sheet so that the needle enters from the back side and comes out from the front.
- Make a second puncture. The needle must enter from the front side and exit from the back.
- Make the third hole. The needle should enter from the back and exit from the front.
- Once again, insert the needle into the first hole and tie a knot, leaving the end of the thread about 7 cm.
- Paste the firmware sheet.
- Sign.
If documents are in a stack, they may get lost
Four holes
Often they require hemming in more than 3 holes. The question arises, how to hem things with 4-hole threads. The sequence of actions if you need to figure out how to sew things with 4 holes is as follows:
- Make holes with a needle;
- Insert the needle from the wrong side through hole number two;
- Insert the threads into the first hole on the right;
- Afterwards the needle is sent into two holes on the right;
- The needle is then sent into the third hole on the right;
- After which there is a transition to the left protocol;
- Move to the third hole;
- It is necessary to make a conclusion on the reverse side and secure it with a knot.
You may be interested in this: The procedure for sewing a fabric and felt bow
Wooden lathe in working position
Five holes
This method is rarely used. Typically, options with 3-4 holes are required. The increase to 5 holes indicates that such documentation is very important and requires strict reporting.
The algorithm for inserting a needle depends on the number of the hole:
- 3–4;
- 4–5;
- 5-4;
- 4-3;
- 3-2;
- 2-1;
- 1–2;
- 2–3.
- The last stage is fixing the thread with a knot.
Fixed papers will not go anywhere


![Applying for a mortgage at Sberbank in [year]](https://htc-htc.ru/wp-content/uploads/oformlenie-ipoteki-v-sberbanke-v-year-godu-330x140.jpg)